3.1. Main screen
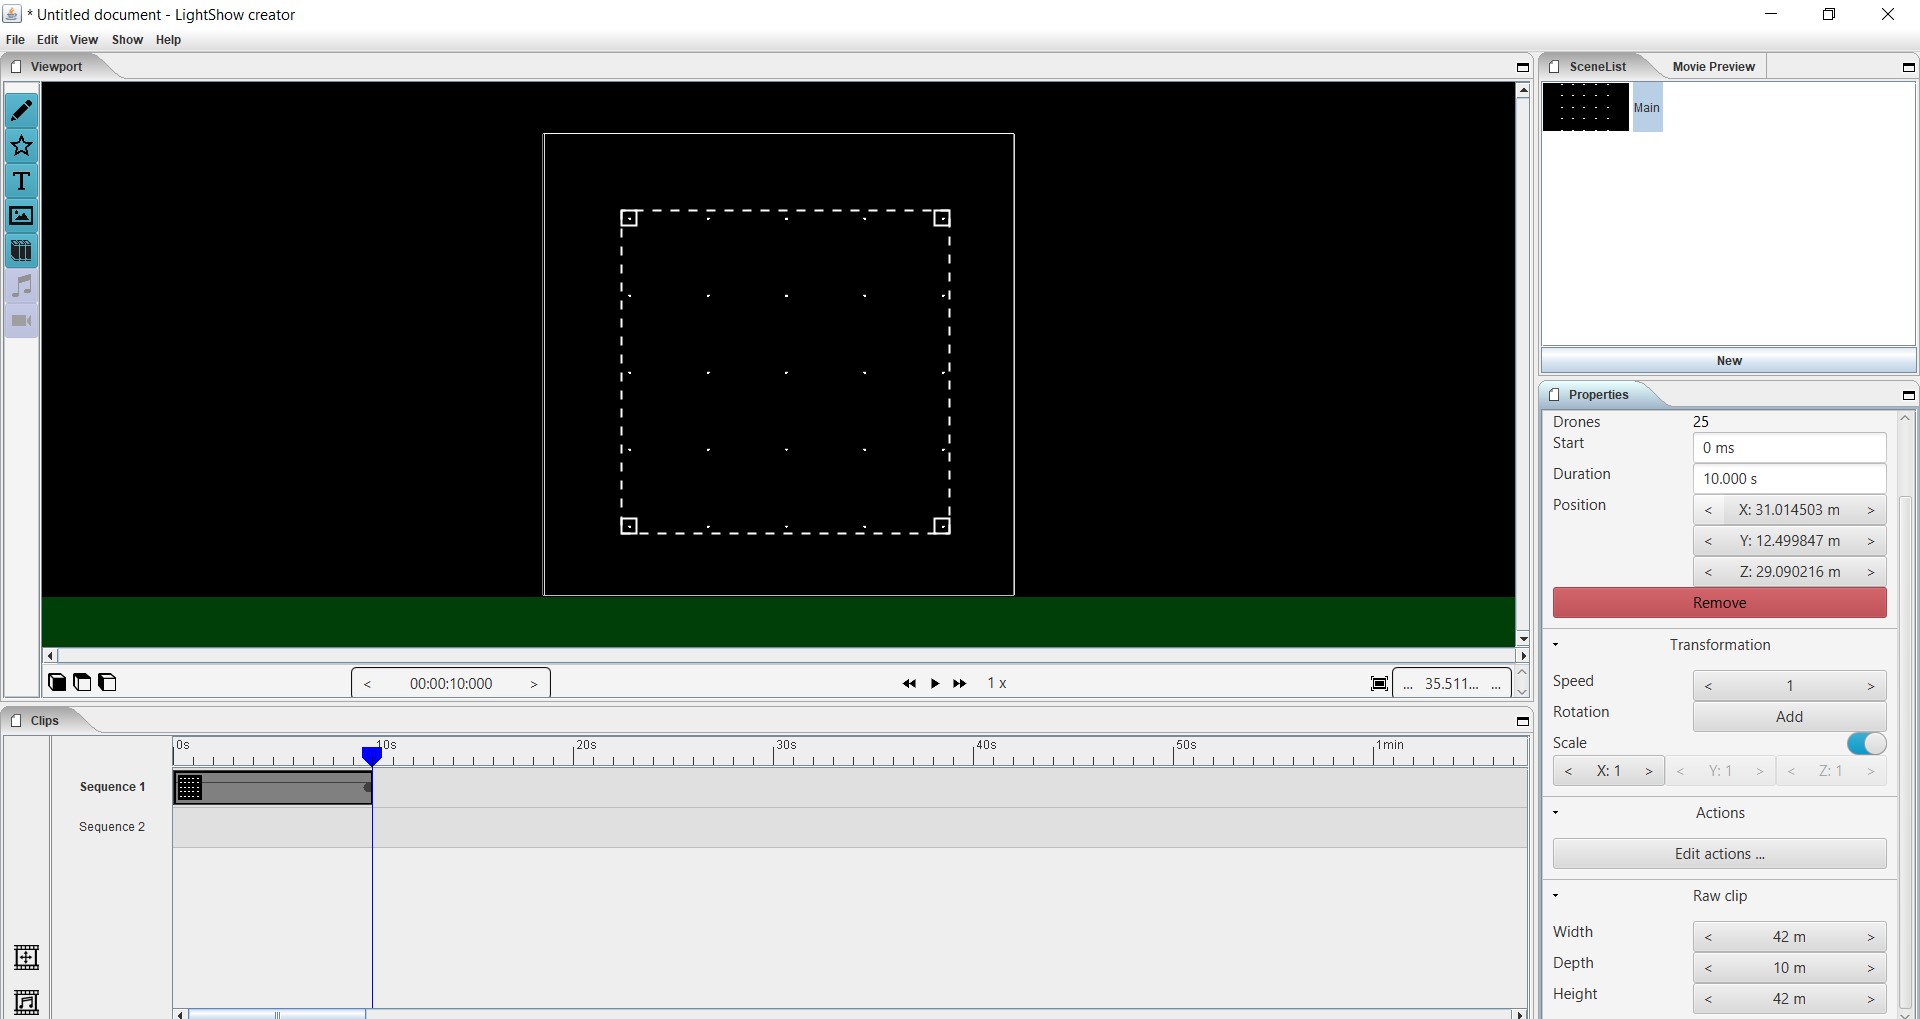
When opening the program you will automatically be taken to the home screen. This is the main part of the program where the editing of clips and scenes are done. The drones are initially placed here for further processing in the sub pages “edit figure” and “edit actions”. You will always start from the home screen to develop an idea.
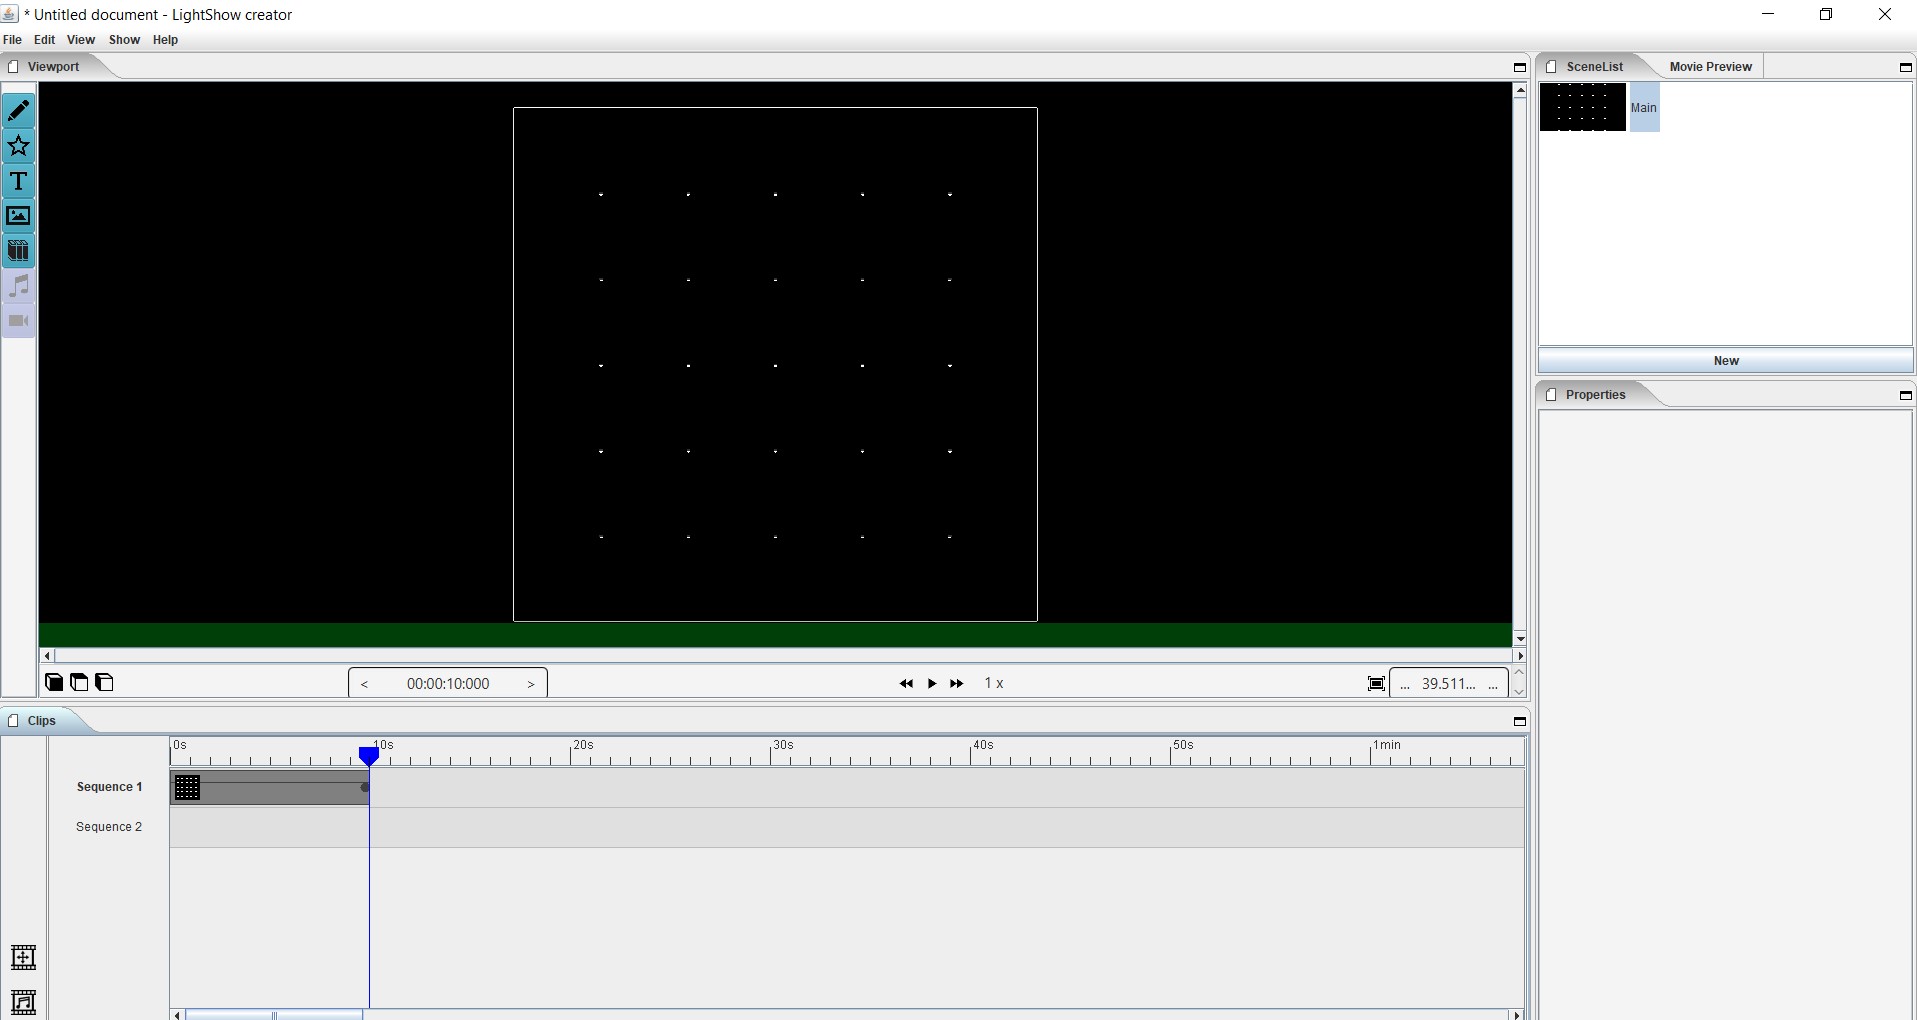
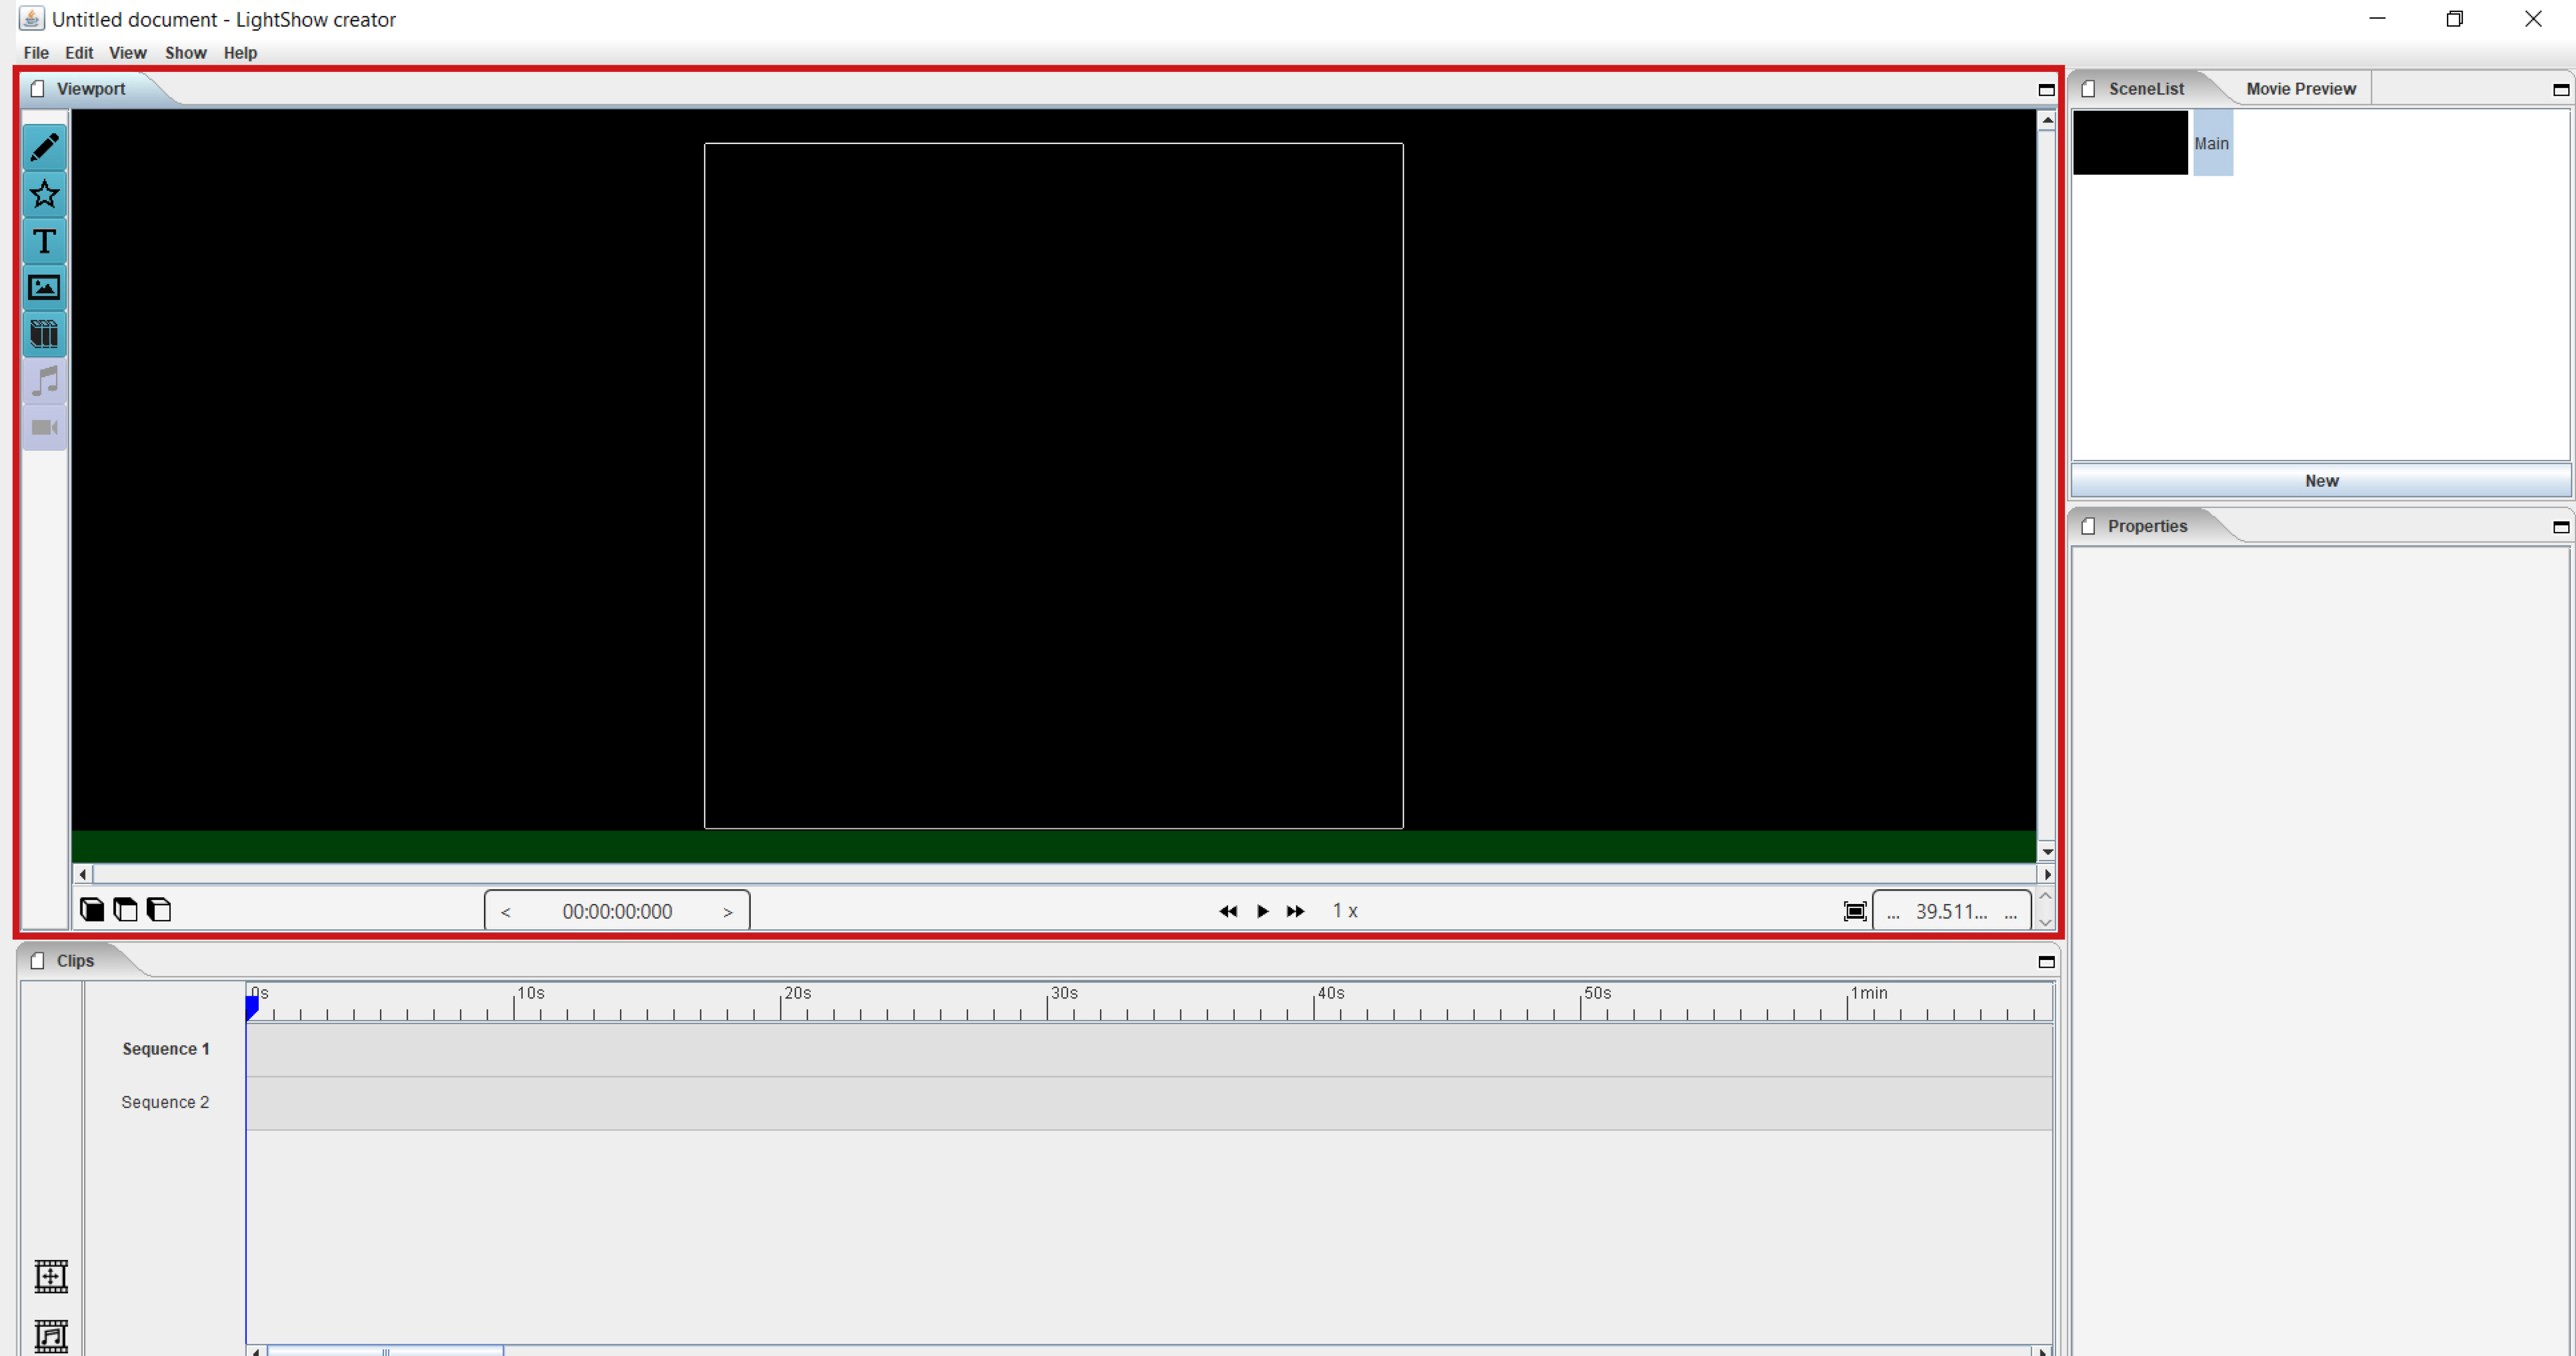
3.1.2. Viewport
In this section you will find the tools to place and select drones within a layout. The placed drones can be visualized in different positions in a simulation using an in and out zoom function. It is also possible to follow the timeline numerically and possibly to slow down or speed up the time.
3.1.2.3. Player
Current time

This time indication shows the position of the cursor needle in hours, minutes, seconds and milliseconds. If you move the cursor manually, the chrone will be adjusted automatically. The reverse way can also be used if you have to place the cursor very precisely, then enter the correct time indication to place the cursor very accurately.
Play button

The left button is used to automatically return the cursor needle to the beginning of the timeline. The middle button is used to play the format. The right button is used to automatically move the cursor needle to the end of the markup, that is, at the end of the last block on the sequence line
Speed

This is the acceleration function, normal speed is 1x, the higher the number, the faster format is played.
3.1.3. Timeline
A sequence is a horizontal space on the timeline where a markup block can be placed. You can create as many sequences vertically one below the other as needed for the intended end result. You can create a new sequence by clicking on the icon for new sequence to the left of the timeline or by dragging a format block down. A sequence is only intended for formatting and not for placing audio files.
3.1.3.1. Timeline
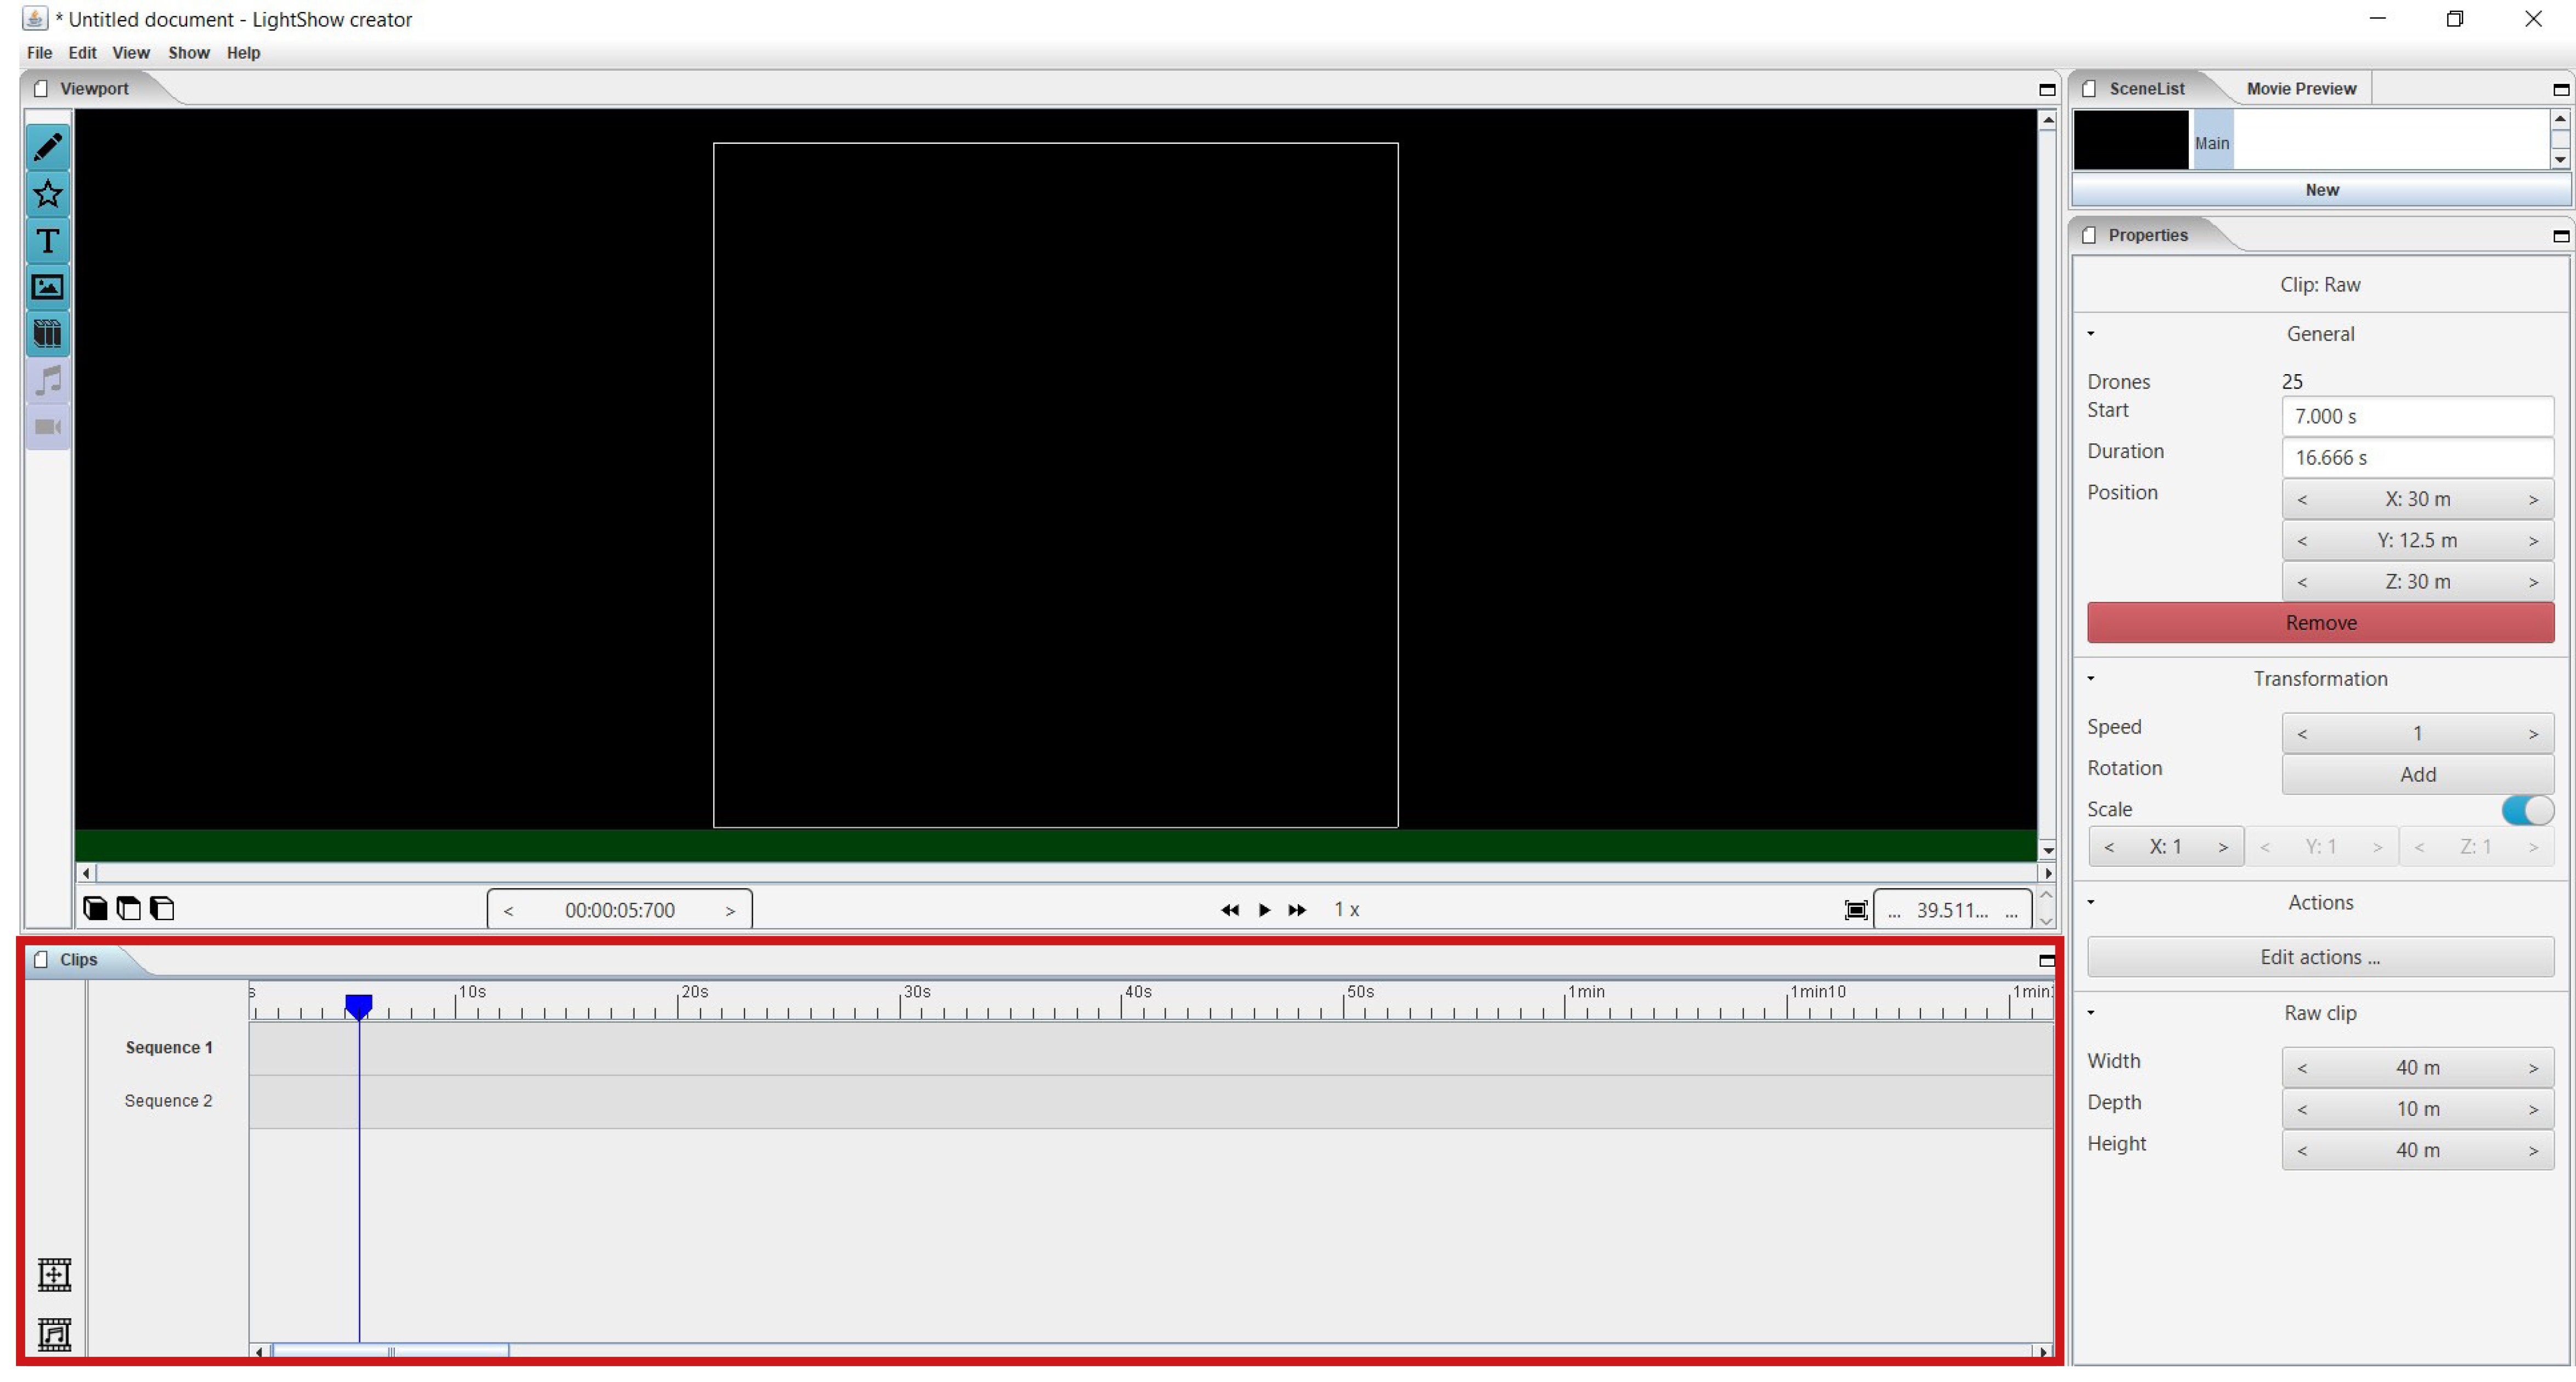
This is the area where clips and scenes are placed on the sequence tracks and the audio files on the audio sequence. The timeline is therefore a collection of clips and scenes that together form a layout. You can also zoom in and out on the sequence timeline to make the blocks bigger or smaller => place the cursor on the numerical indication and roll the mouse wheel to enlarge or reduce.
3.1.3.2. Time indicator
The blue cursor needle always indicates the position of the visualization in the timeline. The needle can always be moved by hand, but it is also magnetic, which means that if you drag a clip to a different position, the needle moves with it and magnetically moves to the right side of that clip. You can also adjust the position of the cursor needle by the clock of the viewport, by adjusting the values the needle will take the position, this can be useful if you have to work in milliseconds. When placing a new clip, it will always be placed where the cursor needle is. Note, there may not be enough space next to the needle to place a new clip because it has a very long time zone, for example. In that case, select a new sequece that is still free to place the clip.*
3.1.3.3. Sequence
A sequence is a horizontal space on the timeline where a clip can be placed. You can create as many sequences vertically one below the other as needed for the intended end result. You can create a new sequence by clicking on the icon for new sequence to the left of the timeline or by dragging a format block down. A sequence is only intended for formatting and not for placing audio files. With the right mouse button you can change the name of the sequence.
3.1.3.4. Audio sequence
This is the same as the regular sequence but only intended for placing audio files. This makes it easy to synchronize image and audio with each other. With the right mouse button you can change the name of the audio sequence.
3.1.3.5. Sequence icon
To create a new sequence track in the timeline. You can also drag a clip or scene down to create unlimited and automatic new sequence jobs.
3.1.3.6. Audio sequence icon
To create a new audio sequence track in the timeline. You can also drag an audio clip down to create unlimited and automatic new audio sequence jobs.
3.1.3.7. Clip and scene
A clip is a block that you place on the sequence track by the pen or star tool and contains x number of drones in a formation that are bound to a certain time duration. You cannot edit a newly placed clip directly with “edit figure”, it must first be converted (by right mouse button) to a raw file (convert into raw). Other options such as edit actions, take a snapshot or delete are available via the right mouse button without converting the clip to raw. A collection of different clips on the timeline can be saved as a scene. For more information see below at scene list.
3.1.4. Scene list
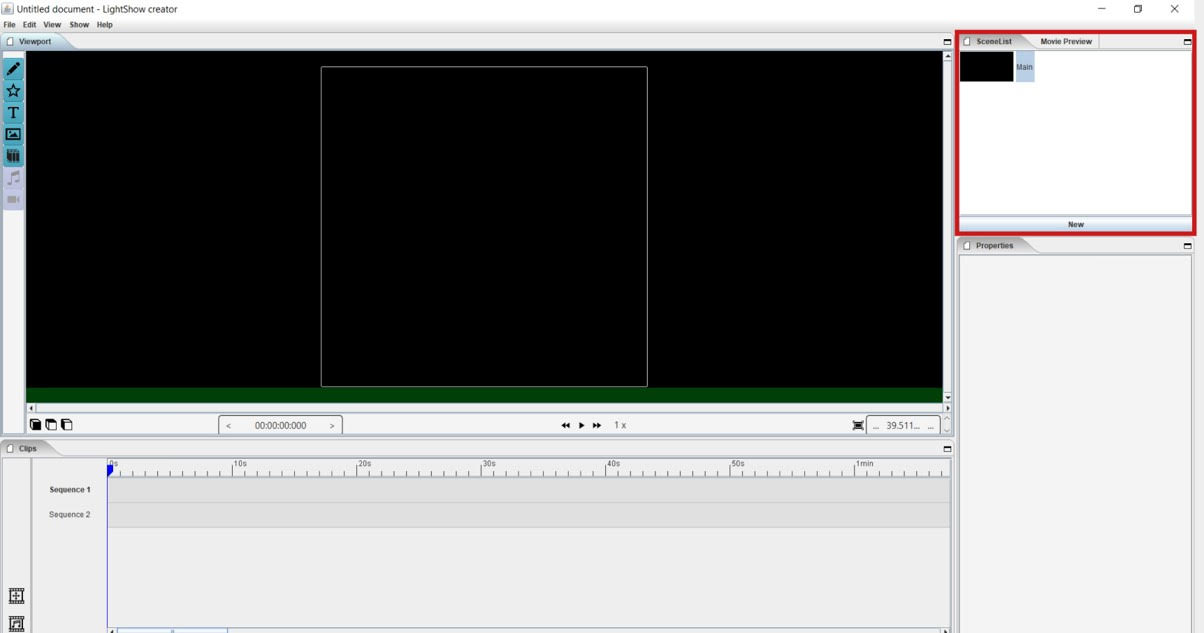
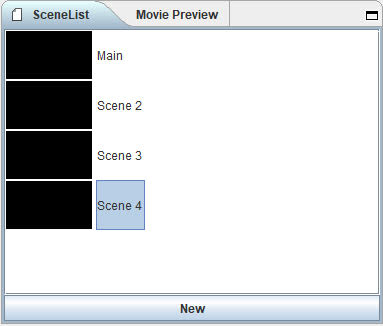
A collection of different clips on a timeline that is saved as a separate block is called a scene. At “scene list” all created scenes are listed.
3.1.4.1. Main
When starting a new light show (= new document), the program will always automatically place a “main scene” in the “scene list”. This is an empty scene where the clips will be automatically placed. The main scene can always be copied, exported or deleted. Use the right mouse button for this. The purpose of the main scene, however, is that all other scenes come together here and this is used as the main scene. It’s best to create a new scene at the start of your edit, name it, place your clips in it, then import them into the “main scene”. A scene with clips can therefore be imported into another scene, where it can be combined with other clips and scenes … so that they can be used interchangeably.
3.1.4.2. New
To create a new scene => select the new scene from the list => go to properties to change the name. At “used drones” you can see how many drones are present in your scene. Note this number can be divided over several clips.
3.1.5. Properties
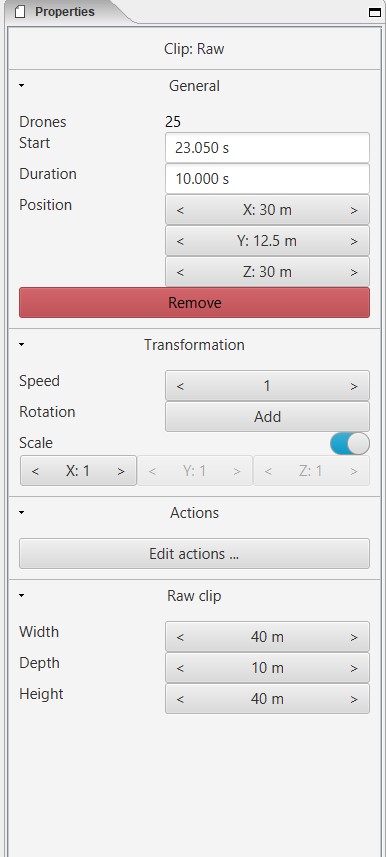
Enter parameters here at the beginning of your design to obtain the desired result. Note, always select your posted clip or scene first to use the properties. If this is not selected, you cannot see anything in properties. When all parameters are entered as desired, the clip must be converted to a RAW clip => right mouse button => convert into raw => the last part of the properties window “formation” will then change to “RAW clip”. The RAW clip can then be adjusted in width, depth and height. The raw clip is always outlined by a white dashed line.
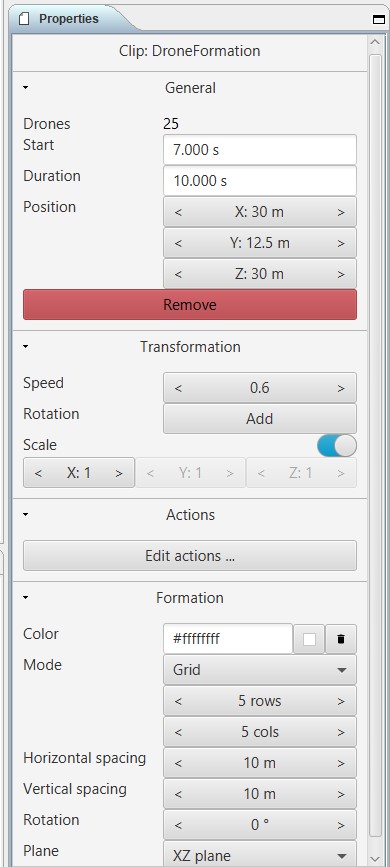
3.1.5.1. General
- Drones
Displays the number of drones placed in the clip or scene.*
Start
Displays the time when the clip or scene starts on the timeline, expressed in milliseconds. If you change this value, the clip or scene will jump in the timeline.
Duration
Displays the duration of the clip or scene on the timeline, expressed in milliseconds. If you change these values, the block of the clip or scene will become longer or shorter.
Position X Y Z
Here you can adjust the position of the placed drones in your clip or scene according to three axes. The X axis is left, right, the Y axis is forward, backward, and the Z axis is up and down.
Remove
With this button you delete the selected clip or scene in the timeline.
3.1.5.2. Transformation
- Speed
With this function you can speed up or slow down the selected clip or scene, depending on your choice, the block in the timeline will become longer or shorter.
- Rotation
First click on the “add” button to activate this function. You can create an unlimited number of rotation buttons and combine them with each other. This function allows you to rotate a design within a clip or scene in three different axes. The “front” axis: the layout will rotate frontally around its center. The “side” axis, the layout will rotate around its center through its side view. The “top” axis, the layout will rotate around its vertical center axis. The values are expressed in degrees, which you can enter manually or use the arrows. If you press the red box with a cross next to the degrees, your setting will be deleted.
- Scale X Y Z
With this function you can enlarge or reduce your design within a clip or scene. If the slider on the right is on, so it has a blue color, the scaling will be done proportionally according to the X, Y, Z axis. You can also choose to scale according to a single axis, then you have to turn off the slider. You can enter the values numerically or use the arrows.
3.1.5.3. Action
Edit action
With this button you automatically go to the edit actions menu, this is the same if you select your clip or scene in the timeline and use the right mouse button to go to edit actions. In the nemu of edit actions you can enter colors and movements, among other things.
3.1.5.4. Formation
- Color
Choose the color you want for your design. Please note, this way you give a color to the entire design of drones. If you want to give a single drone a color you have to go through “Edit figure”. You can determine a color in different ways. The first option is to enter a # code (= web color). You can also choose the colors range, => click on the white box => you will get a colors range to choose from. A third way is the “custom color” at the bottom of the colors range, if you click on this you will get an extra window in which you can choose between HSB color, RGB color or a web color again.
Mode
In mode you will find pre-programmed figurations that you can automatically place as a clip on the timeline. This is actually the very first step you need to take to get started on your design.
Single drone
Place a single drone.
Grid
Place a grid of rows and colons.
5 rows
Enter the number of rows.
5 cols
Enter the number of columns.
Horizontal spacing
Enter the horizontal space between 2 drones, expressed in meters.
Vertical spacing
Enter the vertical space between 2 drones, expressed in meters.
Rotation
To rotate your design around its center, expressed in degrees.
Plane
XZ plane
Place your design according to the XZ axis.
XZ plane
Place your design according to the YZ axis.
YZ plane
Place your design according to the XY axis.
Circle
For placing a circle.
Drone count
Enter the number of drones that form the circle.
Radius
The radius of the circle, determines the size of the circle.
Rotation
To rotate your design around its center, expressed in degrees.
Rectangle
For placing a rectangle.
5 Rows
Enter the number of rows.
5 Cols
Enter the number of columns.
Horizontal spacing
Enter the horizontal gap between 2 drones, expressed in meters.
Vertical spacing
Enter the horizontal gap between 2 drones, expressed in meters.
Radius
The radius of the rectangle, determines the size of the rectangle.
Plane
XZ plane
Place your design according to the XZ axis.
YZ plane
Place your design according to the YZ axis.
XY plane
Place your design according to the XY axis.
Sphere
For placing a 3D sphere.
Drone count
The number of drones forming the sphere.
Radius
The radius of the sphere, determines the size of the sphere.
Polygon
For placing a polygon where you can determine the number of sides.
Drone count
The number of drones per side of the polygon.
Radius
The radius of the polygon, determines the size of the polygon.
Side
The number of sides that make up the polygon.
Star
To place a star-shaped figure, determine the number of sides yourself.
Drone count
The number of drones per side of the star.
Radius
The radius of the star, determines the size of the star.
Side
The number of sides that make up the star.
3.1.5.5. Raw clip
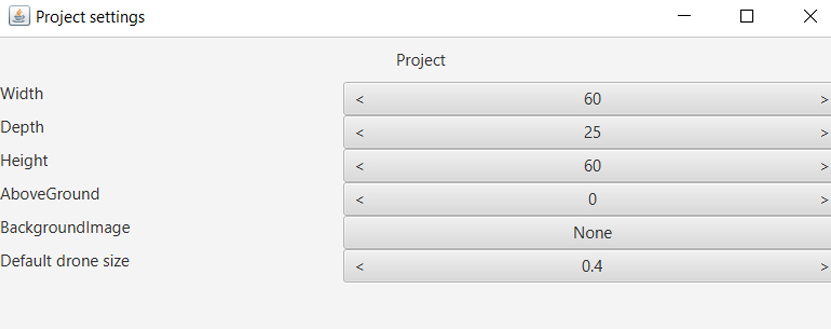
This is the area in which all drones are located, this is the size of the clip. This is visualized by a dotted line. This is not the same as the dimensions of the project in which you enter the size of the flying area. The raw clip (dotted line) is always located inside the flying area (full line) that you enter via Project settings.
- Width
Enter the desired width of the clip here, expressed in meters.
- Depth
Enter the desired depth of the clip here, expressed in meters.x
- Height
Enter the desired height of the clip here, expressed in meters.
